Publish your first event
Add an event, fill in the details, date, venue and tickets, then publish.
For organisers. You need an organisation first.
Step by step
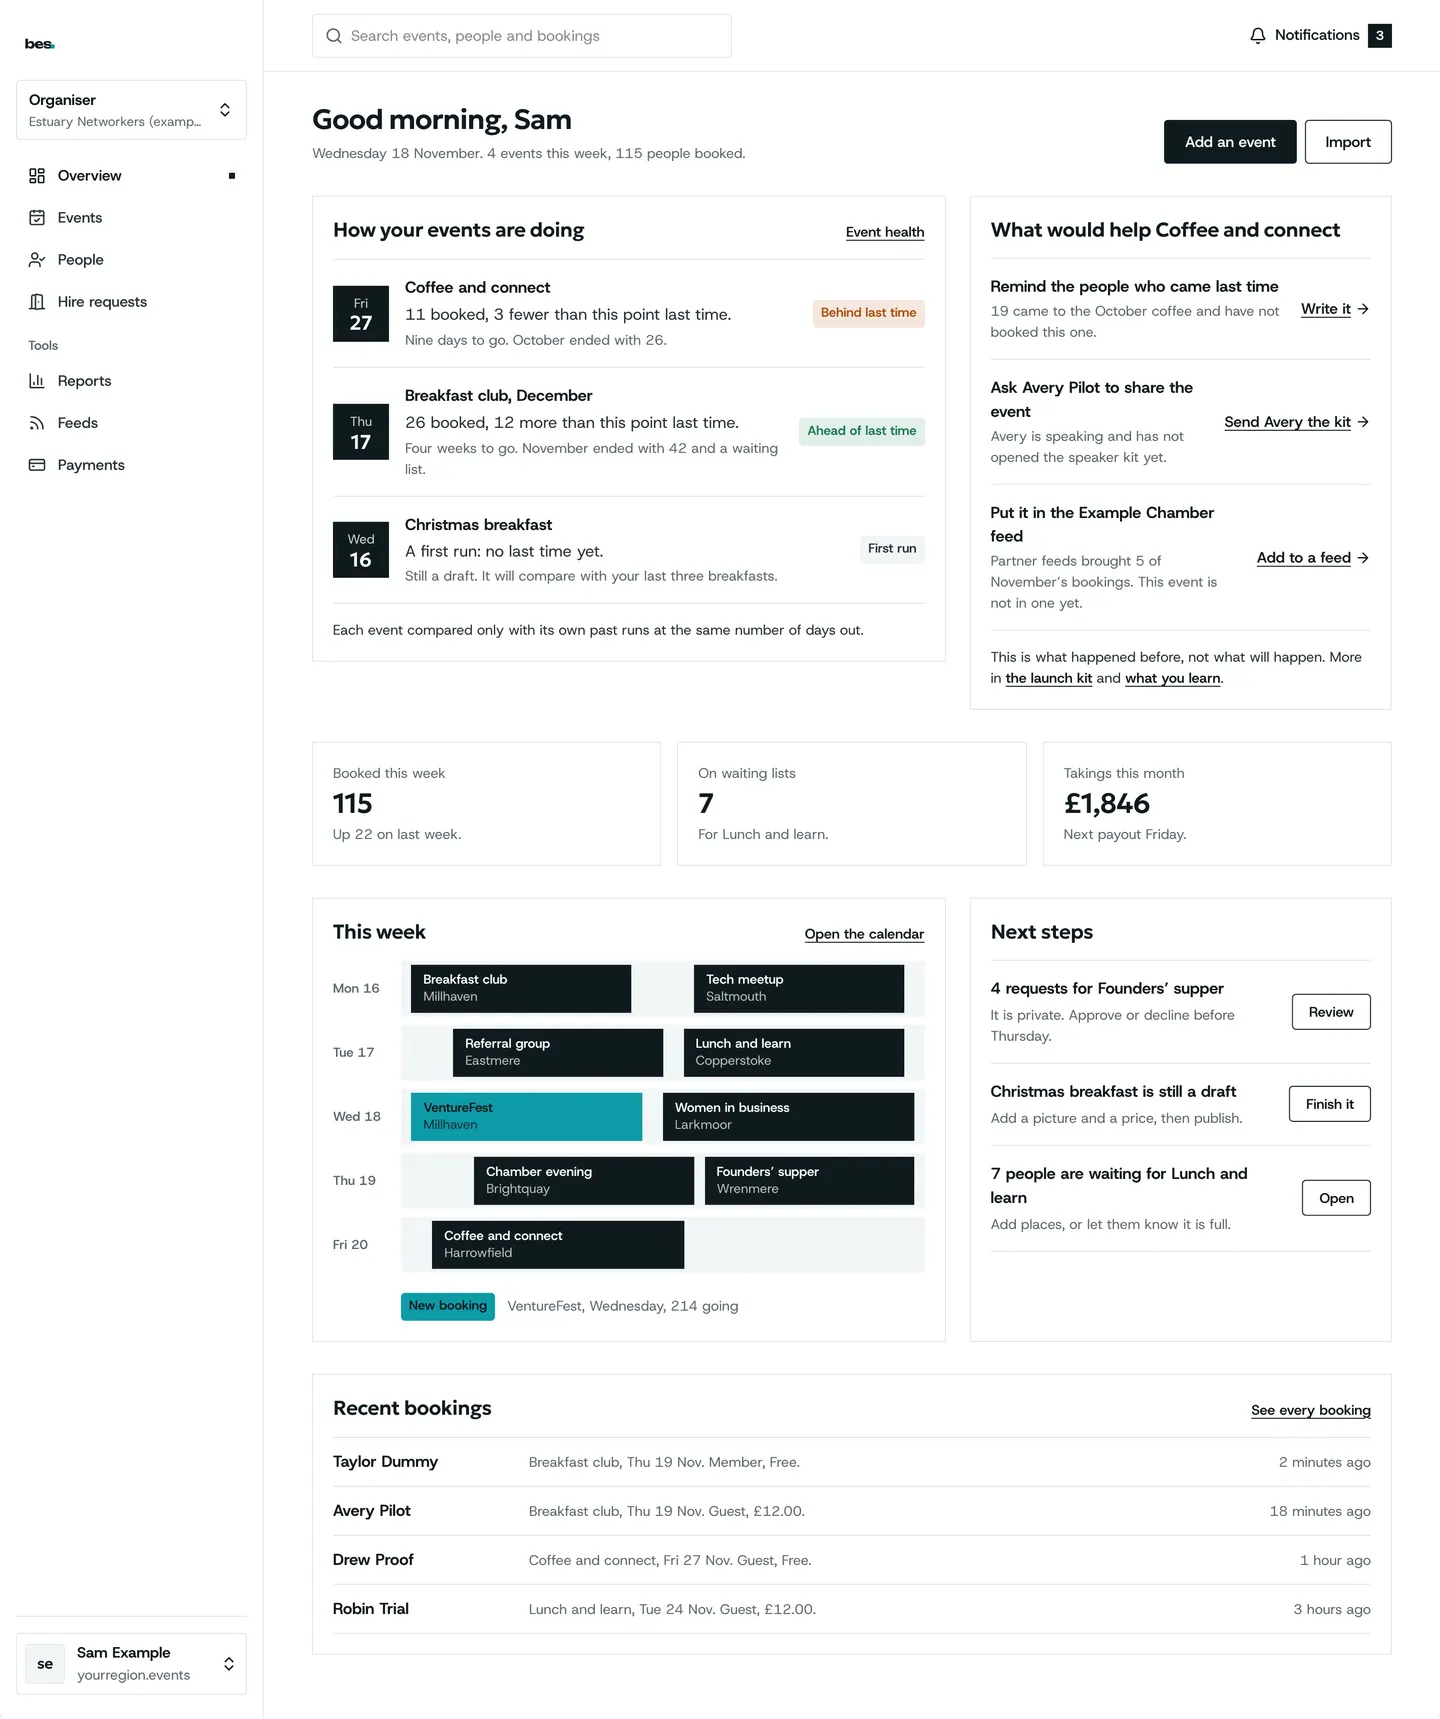
Step 1: Start from your home page
Your home page lists what to do first. Choose Add an event.
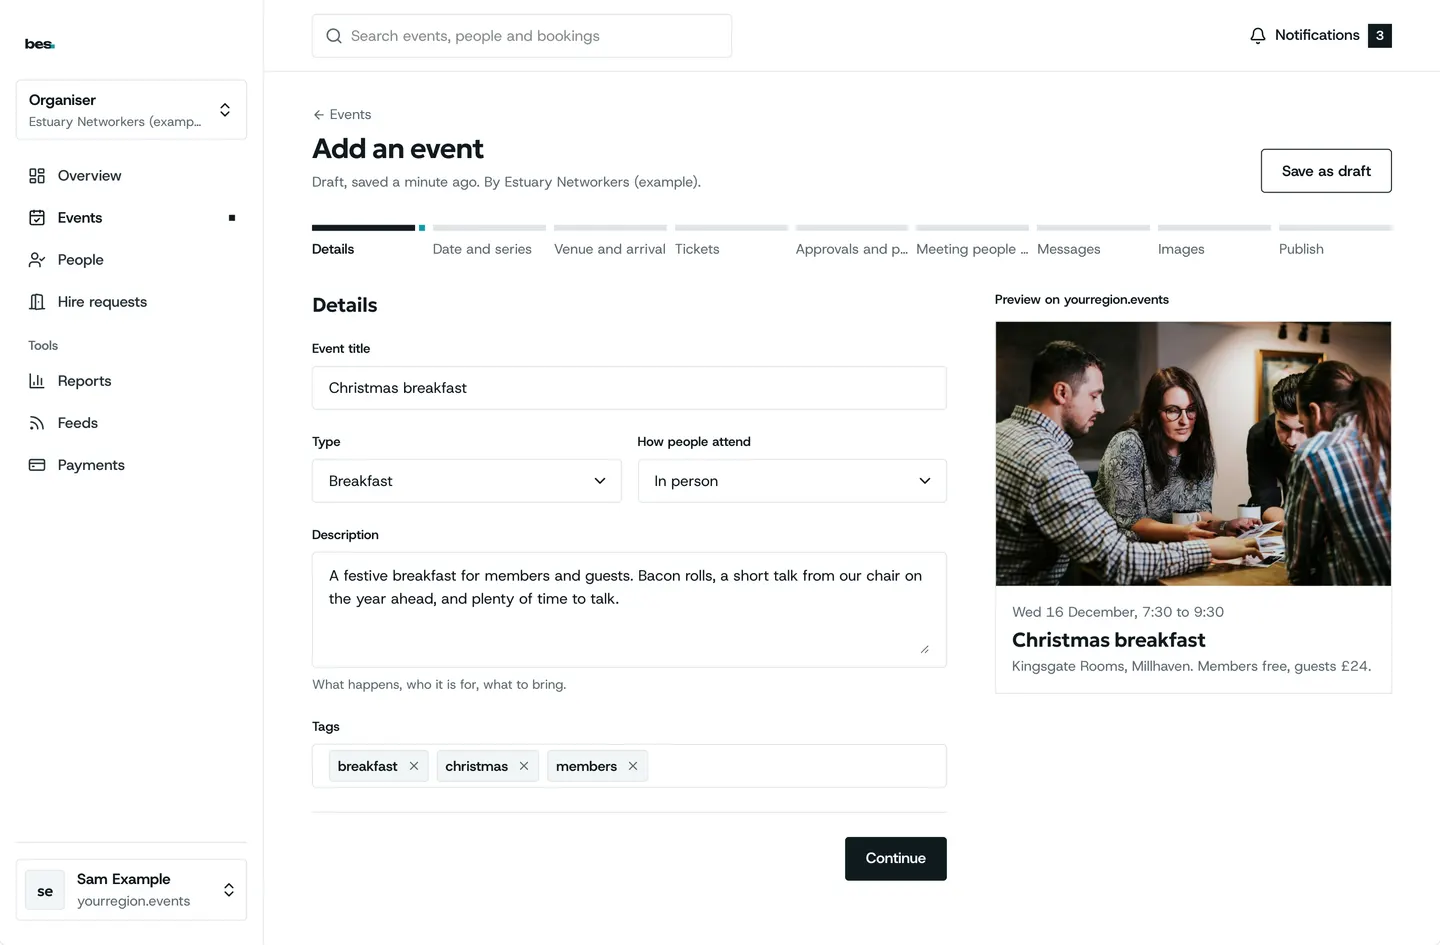
Step 2: The details
Give it a name people would search for. Then say in one line who it is for.
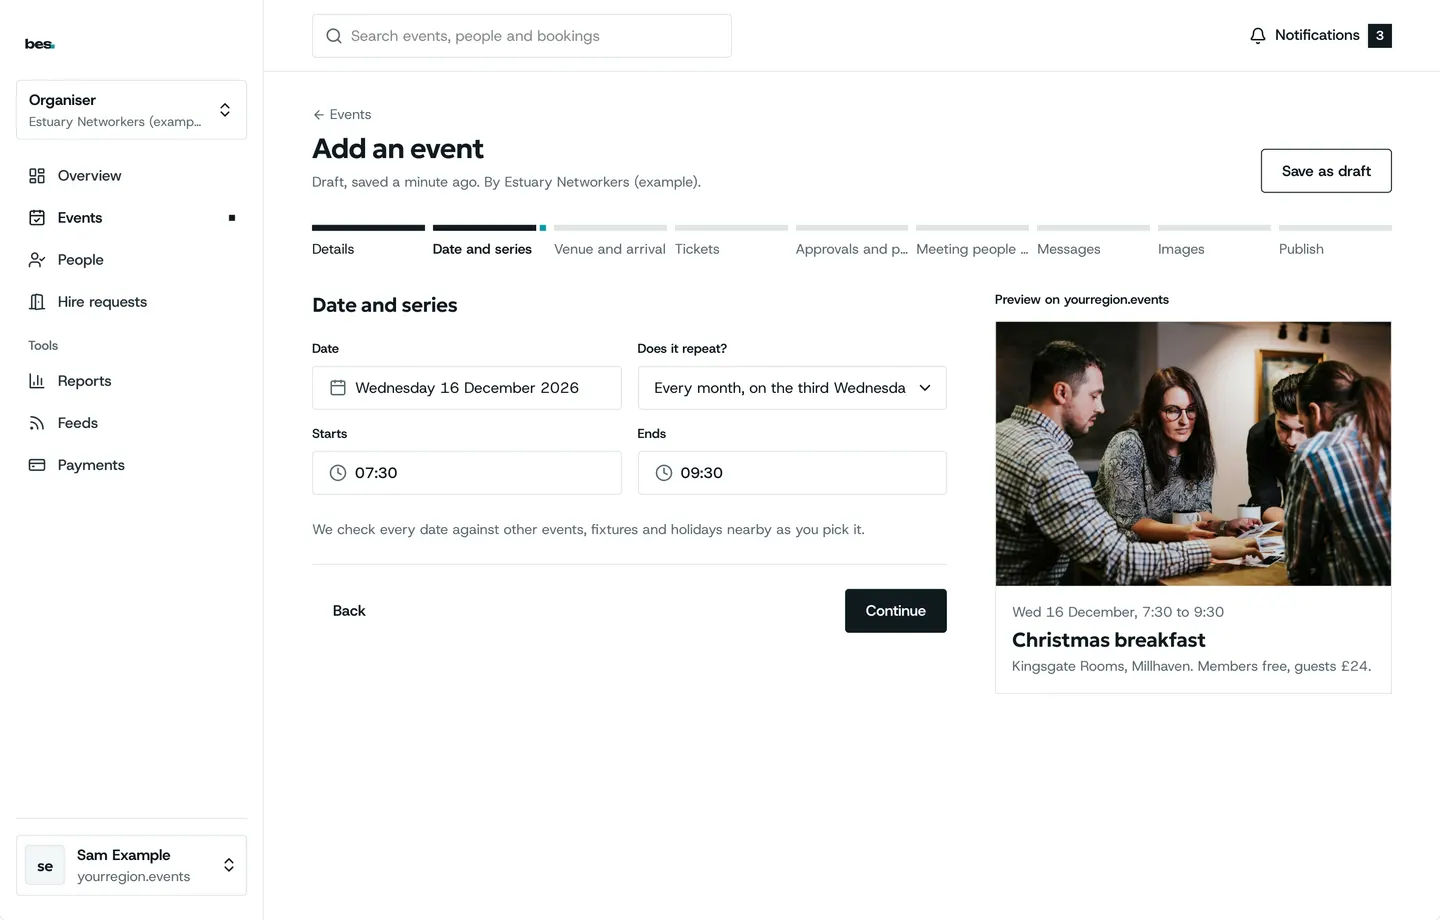
Step 3: Pick the date
Pick the date and time. Anything else nearby that morning shows here, before you choose.
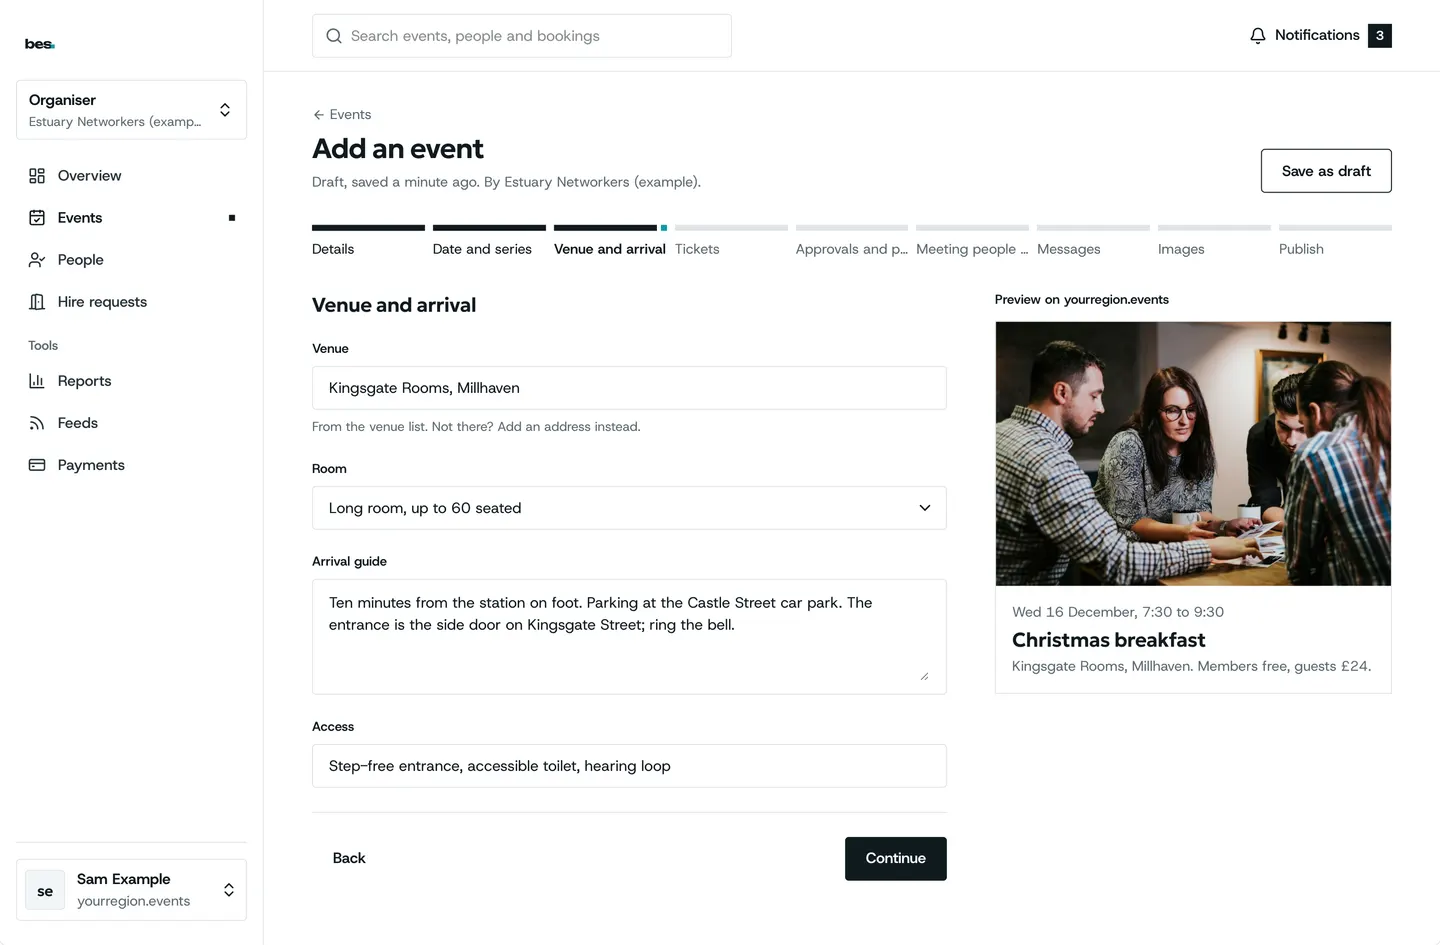
Step 4: Choose the venue
Choose the venue. Parking and the way in come with it.
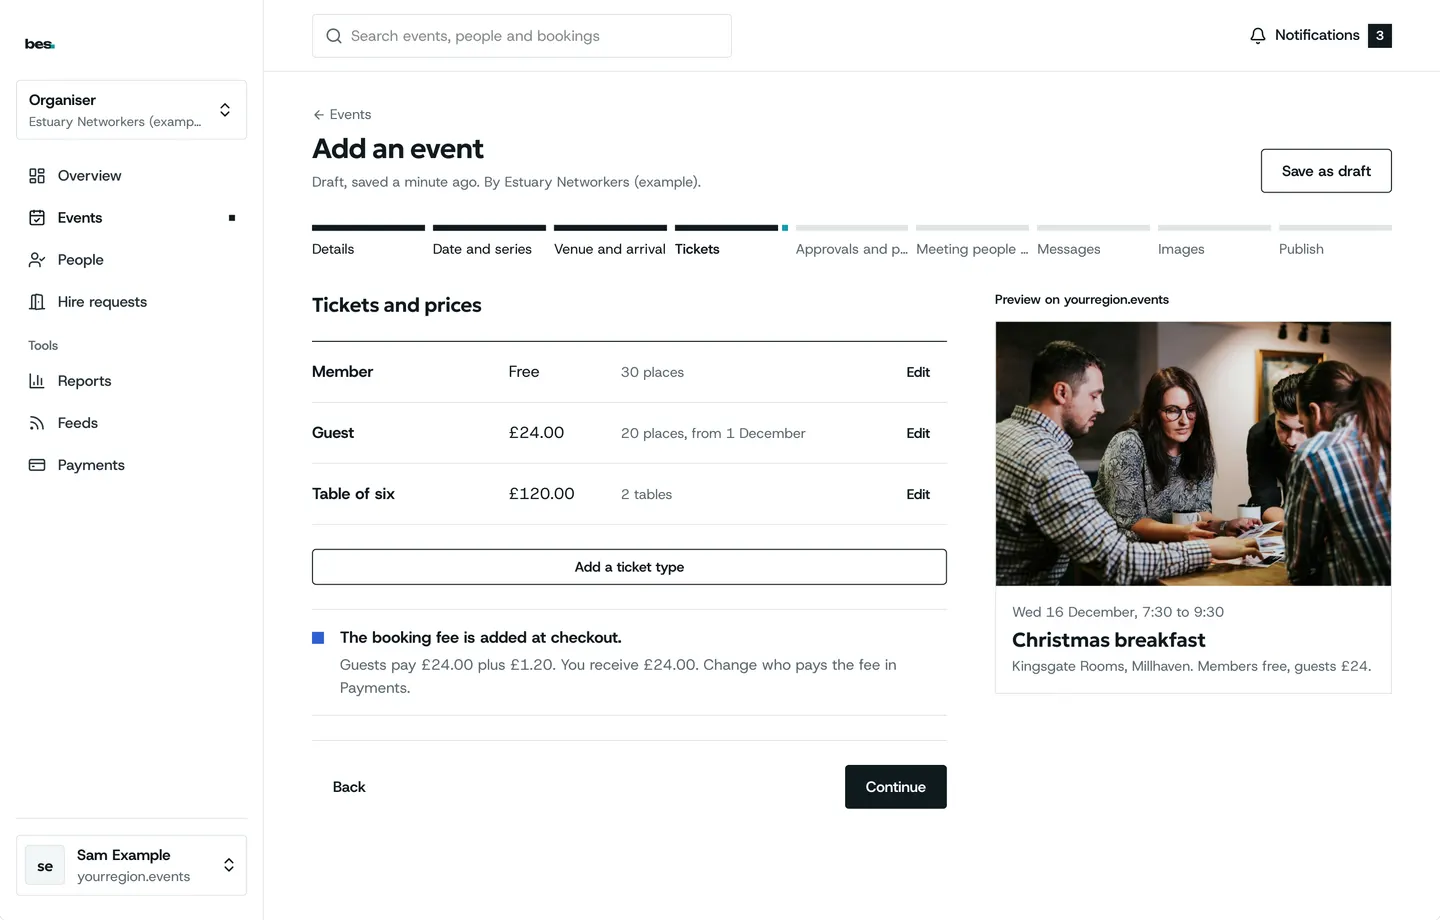
Step 5: Add a ticket
Add a ticket: free, paid, or members first. Set how many places there are.
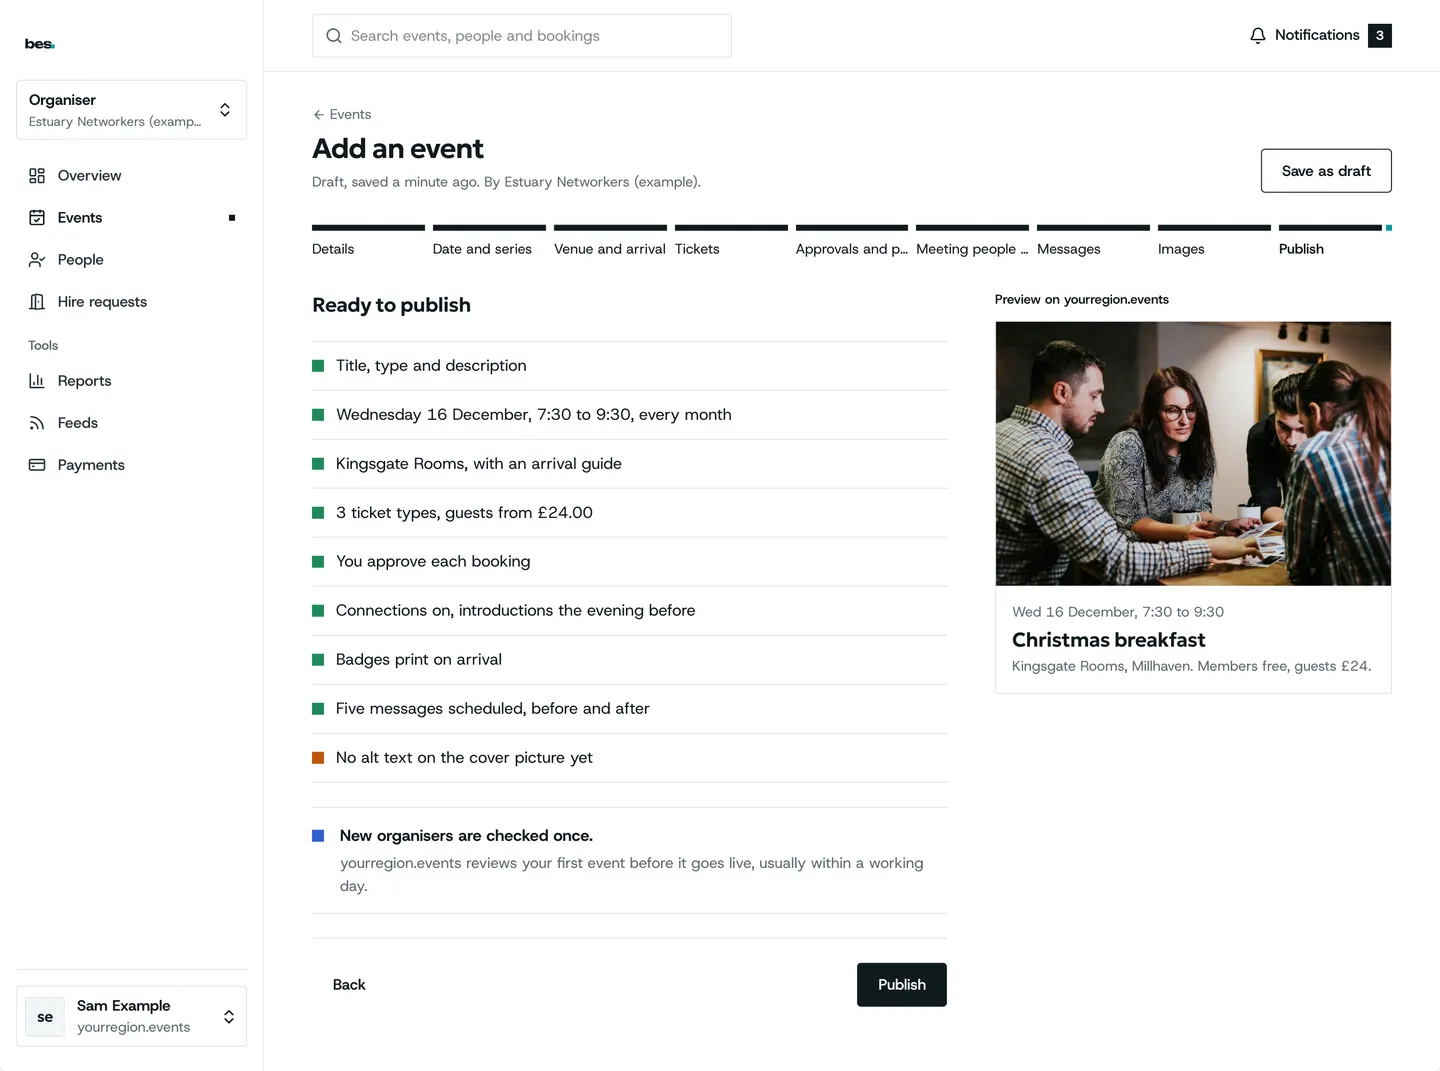
Step 6: Publish it
Read the summary once. When it looks right, choose Publish.
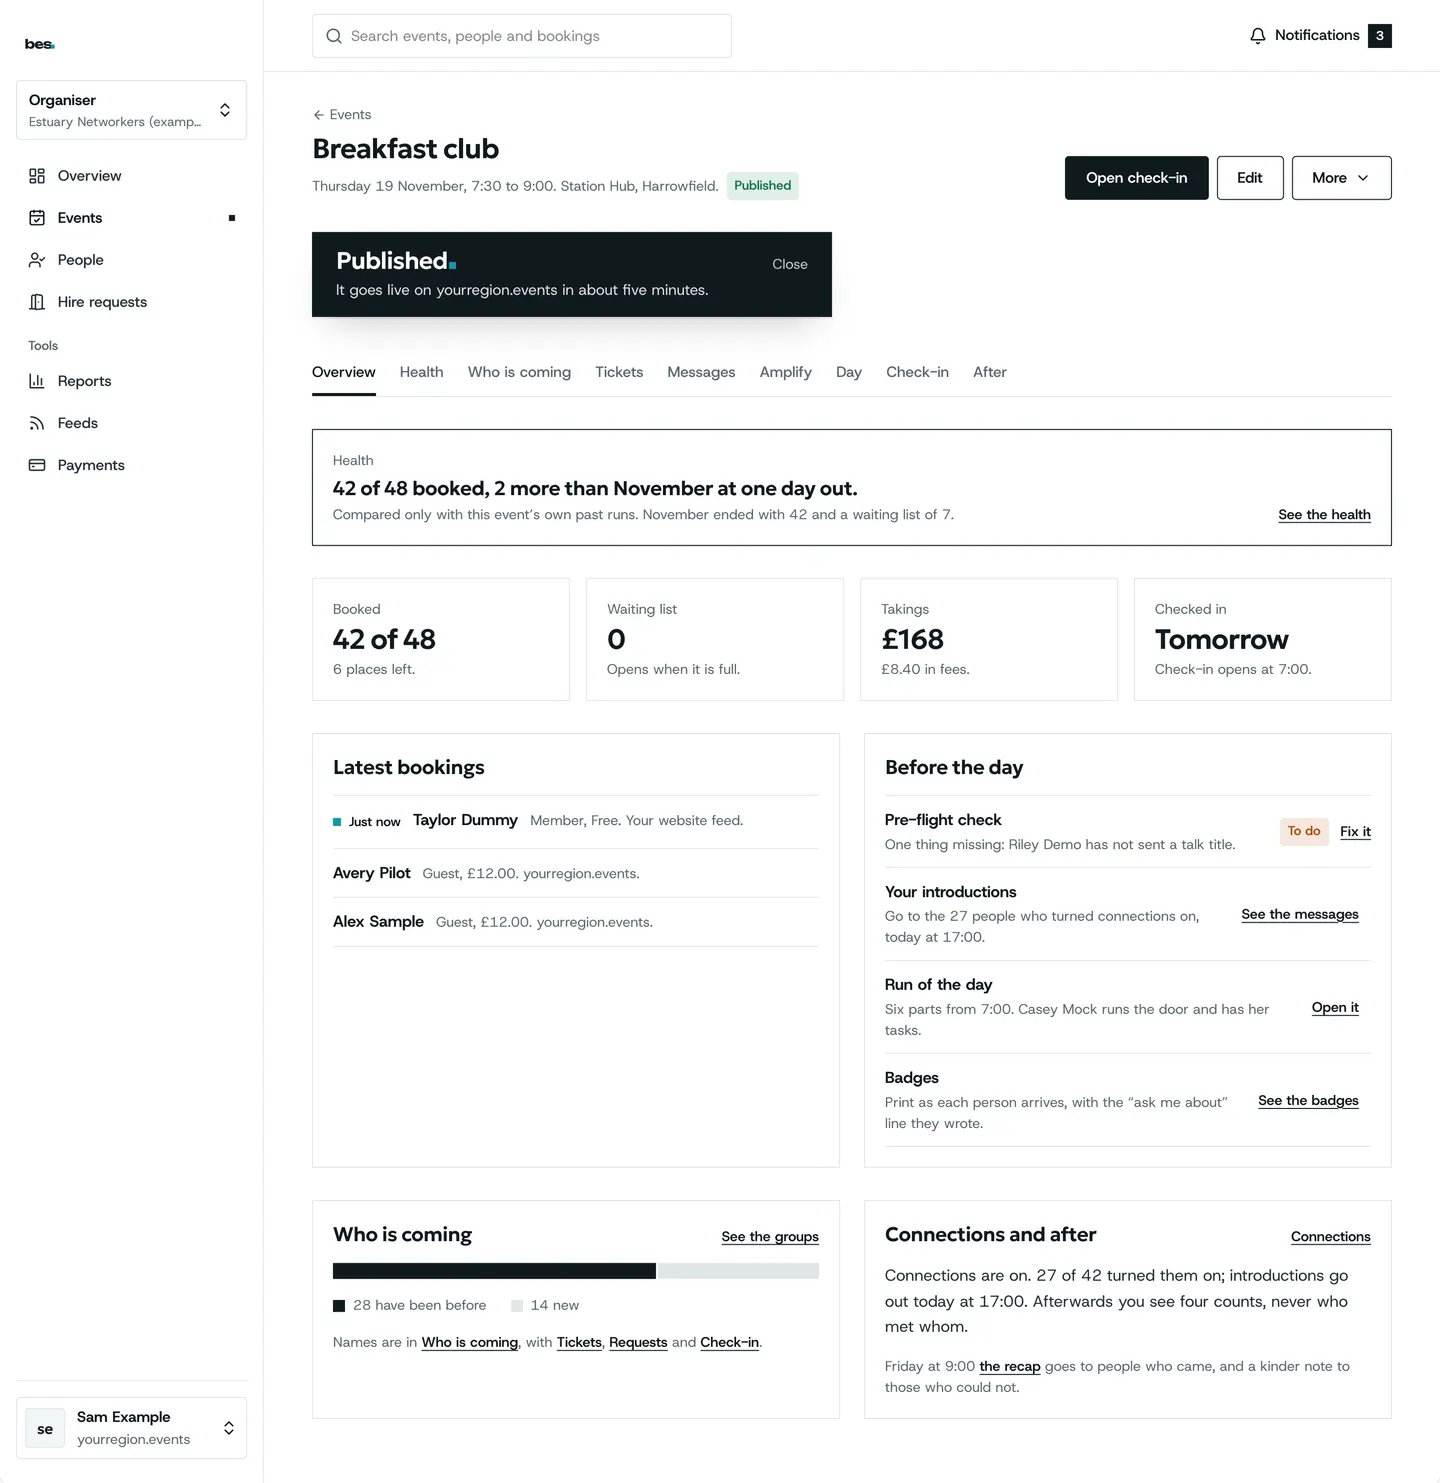
Step 7: It is live
It is live on your region’s site, your website and partner feeds. Bookings arrive here as they happen.
Tips
Save as draft keeps it private until you are ready.
Check for clashes before you pick the date.
If something is wrong
If Publish says it is waiting for review, your platform checks new listings; you are told when it is live.
When an event is reviewed
Good to know
A published event can still be edited; people who booked are told about changes to the date, time or place.
Save as draft keeps it private until you publish.
What’s next
- NextCheck people inOpen the event’s door on a phone, scan each pass, and search by name for anyone without one.Read the guide
- RelatedWhen an event is reviewedSome platforms check new listings first; if one is sent back, the note says what to change.Read the guide
- RelatedRepeating eventsIn the editor’s date step, choose Repeats and the pattern; every date shows on one page.Read the guide
- RelatedCheck for clashesPicking a date shows anything else on that morning nearby.Read the guide
More about this on Listings and series, one of our feature pages.
Was this helpful?
Reviewed 12 November 2026 and checked against the app that day. General information as at 12 November 2026, not legal, tax or financial advice. Screens show example data.